
Aluminum-steel Rivet Installation Instructions by YUKE
We provide a detailed guide on the proper installation of aluminum steel blind rivets(including aluminum-steel hollow rivets and solid steel rivets), covering installation tools, preliminary preparations, step-by-step procedures, precautions, and troubleshooting. This guide is suitable for aluminum-steel rivets with diameters ranging from 2.4 mm to 6.4 mm, and is also applicable to YUKE’s custom-made aluminum steel rivets. The instructions are simple and easy to follow, balancing professionalism with practicality to help you efficiently complete riveting tasks while ensuring a secure bond and long service life.
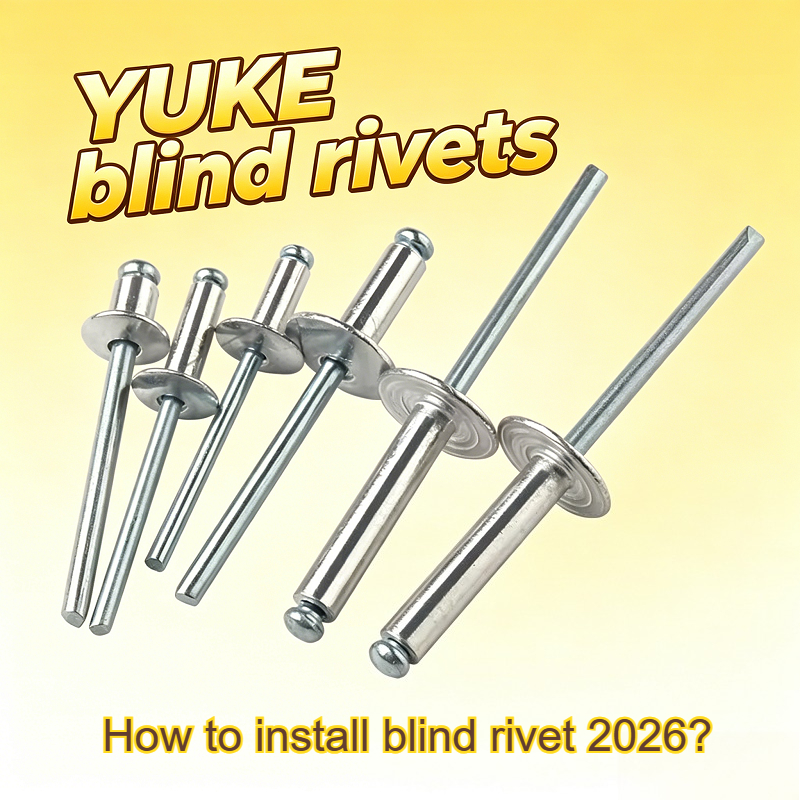
YUKE specializes in the production of various rivets, primarily offering products made from aluminum, steel, stainless steel, and other materials. Our core products include aluminum-steel pop rivets, all-steel rivets, lantern rivets, seahorse rivets, decorative rivets, and all-stainless steel rivets. Standard sizes range from 2.4 mm to 6.4 mm in diameter. We offer custom manufacturing services tailored to specific installation requirements, workpiece materials, and load-bearing needs, ensuring optimal product compatibility and installation results throughout the process.
I. Pre-Installation Preparation
1.1 Tool Preparation (Core Tools + Auxiliary Tools)
Installing aluminum-steel rivets requires the use of compatible tools, which should be selected based on the rivet type (blind/solid) and installation scenario. Tool quality directly affects the riveting results; it is recommended to use professional tools that match the rivet specifications. The specific list is as follows:
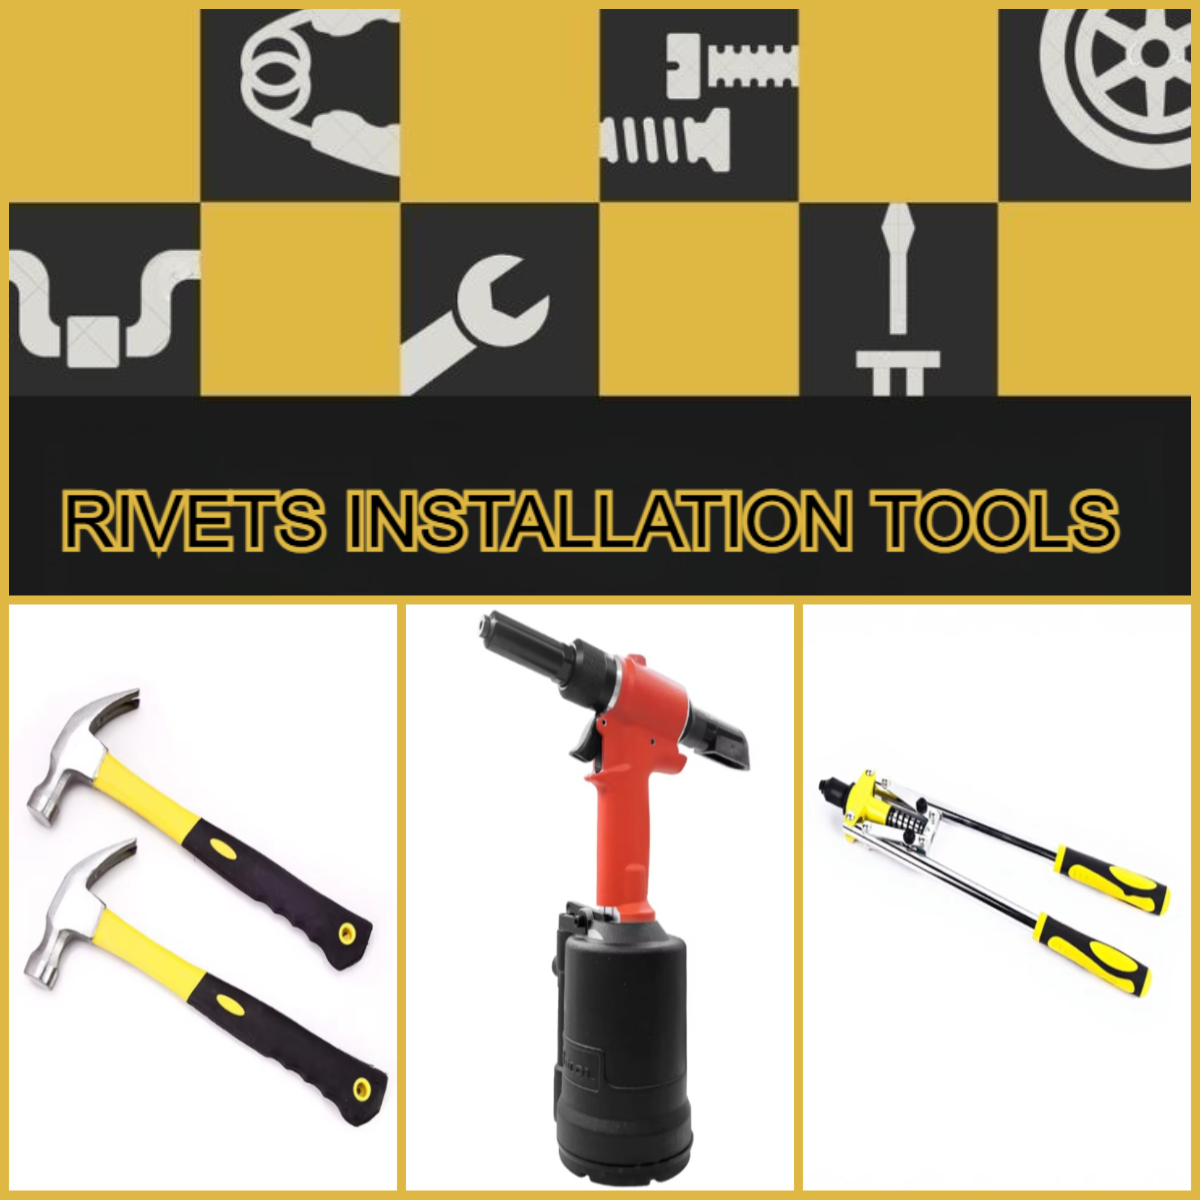
• Core Tools: Rivet gun (preferably a pull-type rivet gun, suitable for aluminum-steel hollow-core rivets; for solid-steel rivets, a punch riveter or rotary riveter is recommended for more efficient bulk installation; for sporadic tasks, a manual pull rivet gun is suitable), electric drill (or cordless drill), matching drill bits (the drill bit diameter must match the rivet shank diameter, typically 0.1–0.2 mm larger to ensure smooth insertion).
• Auxiliary tools: Calipers/ruler (accuracy 0.02 mm, used to measure rivet dimensions, workpiece thickness, and hole positioning accuracy), cleaning agent (alcohol or specialized metal cleaner, used to clean the workpiece surface), protective gloves, safety goggles (for safety protection to prevent injury from metal debris or splashes during operation), clamps (to secure the workpiece and prevent shifting during riveting), sandpaper (for smoothing burrs and rust from the workpiece surface).
• Alternative tools: If a rivet gun is unavailable, solid steel rivets can be set using a hammer (with a punch) by striking the rivet shank to deform it and complete the riveting process. This method is only suitable for small batches and low-stress applications.
YUKE find some riveting tools for your reference.
1.2 Preparation of Materials and Workpieces
• Rivet Inspection: Verify that the selected aluminum-steel rivets (diameter 2.4 mm–6.4 mm) and type (aluminum-steel hollow-core/solid steel) match the workpiece requirements. Inspect the rivet surface for cracks, burrs, and scale; ensure the head perpendicularity deviation is ≤1°, and keep dimensional tolerances within ±0.2 mm (verifiable with a caliper); For custom-made rivets, verify the custom parameters (dimensions, material composition) to ensure they align with installation requirements.
• Workpiece Preparation: Clean the surface of the workpiece to be riveted, removing oil, rust, dust, and burrs. Use sandpaper for grinding or cleaning agents for wiping to ensure the workpiece surface is flat and dry, preventing contaminants from affecting the strength of the rivet joint; If the workpiece consists of dissimilar materials (e.g., aluminum and steel joints), a 0.2 mm thick PTFE insulating sleeve must be fitted over the rivet shank to prevent electrochemical corrosion.
• Hole Pre-treatment: Mark the hole positions on the workpieces to be riveted according to the rivet diameter, ensuring precise positioning and uniform spacing (rivet spacing ≥ 3d, where d is the rivet diameter; edge clearance ≥ 2d); Use an electric drill to drill holes vertically; the drilling depth should be slightly greater than the length of the rivet shank (to allow for rivet deformation). The surface roughness of the hole walls should be Ra ≤ 12.5 μm. After drilling, blow out any metal shavings from the holes with compressed air and wipe the hole walls with acetone.
1.3 Environmental and Safety Preparations
The installation area must be kept dry and well-ventilated; avoid damp or excessively dusty environments (to prevent rusting after riveting). When the ambient temperature is below -5°C, aluminum-steel rivets must be preheated (to a temperature of 50–80°C). In case of rain or when relative humidity exceeds 85%, suspend outdoor work and take measures to protect the components from rain; Suspend high-altitude riveting operations when wind speeds exceed 10.8 m/s (Force 6 winds).
Before operation, put on protective gear (protective gloves, safety goggles) and check the condition of tools: adjust the air pressure of the rivet gun (pneumatic models) to 0.6–0.8 MPa, ensure an impact frequency of ≥3,000 times per minute, verify that the gun head matches the rivet model, and check that the jaws and jaw sleeves show no wear; ensure that tools such as electric drills and hammers are free of looseness or damage to ensure operational safety.
II. Step-by-Step Installation Guide (Suitable for Aluminum Steel Self-Piercing Rivets and All Steel Rivets)
2.1 Installation Steps for Aluminum Steel Blind Rivets ( Suitable for Most Applications)
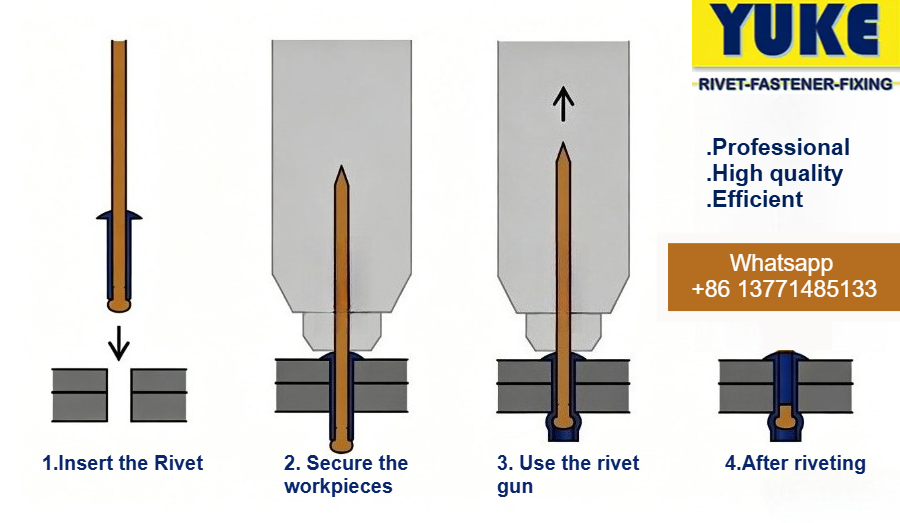
1. Insert the Rivet: Insert the shank of the aluminum-steel hollow-core rivet into the rivet gun’s chamber. Ensure the rivet head (the rounded end) is flush against the workpiece surface, with the shank’s tail (the hollow-core end) facing outward. The tail should protrude by 1/3 to 1/2 of the rivet’s total length (adjust based on workpiece thickness to ensure sufficient deformation after riveting). Avoid tilting or loosening the rivet.
2. Secure the workpieces: Use clamps to firmly secure the two (or more) workpieces to be riveted, preventing them from shifting during the riveting process. Ensure the holes are aligned to avoid crooked or loose rivets.
3. Align the rivet gun: Align the gun head of the rivet gun with the tail end of the rivet, ensuring the gun head is coaxial with the rivet’s axis (coaxiality deviation ≤ 3°). Grip the rivet gun handle firmly so that the gun head fits snugly against the rivet tail with no gaps.
4. Performing the Riveting: Slowly press the rivet gun handle, applying even pressure, and continue applying pressure until the rivet shank is swaged and the head is formed. For self-piercing rivets, you will hear a sound, indicating that the mandrel has been severed; stop applying force at this point. For pneumatic riveting guns, maintain a constant pressure after starting the tool to avoid excessive pressure causing the rivet or workpiece to crack; insufficient pressure will result in a loose rivet.
Rivet Inspection: Release the rivet gun, remove the broken mandrel, and inspect the riveted joint: the rivet head should lie flush against the workpiece surface without any warping or cracks; the base of the rivet shank should be fully expanded and rounded, with no looseness or missed rivets; Gently shake the workpiece to ensure there is no wobble. If necessary, use a caliper to measure the diameter of the expanded rivet head, which should be 1.4 to 1.5 times the original diameter.
2.2 Installation Steps for Steel Blind Rivets (Suitable for solid steel rivets; includes cold riveting and hot riveting)
2.2.1 Cold Riveting Process (Operated at room temperature; suitable for all-steel rivets with a diameter ≤ 6.4 mm)
1. Insert the Rivet: Insert the all-steel rivet into the pre-drilled hole from one side of the workpiece, ensuring the rivet head lies flush against the workpiece surface and the other end of the shank protrudes from the workpiece surface. Adjust the protrusion length according to the workpiece thickness (typically 1.2–1.5 times the shank diameter).
2. Fix and Position: Secure the workpiece with a fixture to ensure relative immobility between the workpiece and the rivet. Place a shim on the exposed end of the rivet (to prevent damage to the workpiece surface during hammering).
3. Hammering and Riveting: Using a hammer and punch, strike the exposed end of the rivet evenly until the rivet shank deforms and swells, firmly clamping the workpiece. Apply consistent force during hammering to avoid excessive force that could cause the rivet to bend, break, or deform the workpiece.
4. Quality Inspection: Check that the riveted joint is free of looseness, that the deformed tail of the rivet is uniform, and that it fits tightly against the workpiece surface without burrs or cracks. Perform a tensile test if necessary to ensure the shear strength is ≥320 MPa.
2.3 Additional Notes on Installing Custom Aluminum-steel Rivets
Custom aluminum-steel rivets (with dimensions and shapes adjusted according to customer requirements) follow the same installation procedure as standard aluminum-steel rivets. Key precautions:
• Before installation, double-check the dimensions and hole compatibility of the custom rivets. If the rivets have special shapes (such as irregular head shapes), use dedicated gun heads or dies to prevent damage to the rivets during the riveting process.
• If non-standard rivets are used in special load-bearing scenarios (such as heavy loads or high temperatures), adjust the riveting pressure and stroke according to the specialized operating guidelines provided by our factory. If necessary, conduct a trial riveting test (with a sample size of no fewer than 3 sets).
III. Common Installation Problem and Solutions
|
Common Issue Cause Solution
|
reason |
Solution |
| Rivet cannot be inserted into the pre-drilled hole | Hole diameter too small, burrs on the rivet shank | hole misaligned Re-drill the hole using a suitable drill bit, sand down burrs on the rivet shank, and correct the hole’s vertical alignment |
| Looseness or wobble after riveting Insufficient force applied | rivet too short, hole diameter too large Re-rivet and apply more force | replace with a longer rivet; adjust the fit between the hole diameter and the rivet shank |
| Rivet cracks or deforms Excessive force | rivet material incompatible with the workpiece, tool angle incorrect Reduce the force applied | replace with an aluminum-steel rivet of compatible material; adjust the tool angle to ensure it remains perpendicular to the rivet |
| Blind rivets cannot be pulled out Worn nozzle | insufficient pressure, or excessive tightness between the mandrel and the rivet shank Replace the worn nozzle and adjust the rivet gun pressure | inspect the rivet quality and replace with qualified products |
| Rivet head does not seat flush with the workpiece Misaligned hole | insufficient rivet length, or uneven workpiece surface Correct the hole’s verticality and replace with a longer rivet | sand the workpiece surface to ensure it is flat |
IV. Product and Service Description
Yuke specializes in the production and customization of aluminum steel rivets. Our standard product range includes aluminum-steel pop rivets and all-steel rivets, with diameters ranging from 2.4 mm to 6.4 mm. We also supply various types of rivets, such as lantern rivets, seahorse rivets, decorative rivets, and all-stainless steel rivets. All products undergo rigorous quality inspections to ensure compliance with riveting standards.
For special installation scenarios and specific workpiece requirements, we offer custom manufacturing services. We can design and produce aluminum-steel rivets tailored to the installation parameters and load-bearing requirements provided by our customers. We also provide professional installation guidance to resolve any issues that may arise during the installation process.
If you have any questions regarding the installation of aluminum-steel rivets or require custom products, please feel free to contact us at any time. We will provide you with efficient and professional solutions to ensure the successful completion of your riveting projects.
Post time: Apr-08-2026